|
Yamaha FJR Auxiliary Fuel Tank - Version 1 |
|
|
This is the second aux tank for me. The first one was for my Concours. And, once you get used to having one, you never want to be without. And it sure doesn't take much saddle time to get used to having one. |
|
| My drawings are normally done in... don't laugh... Excel. |
|
|
|
|
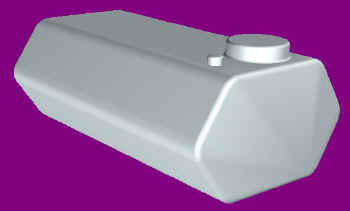
| I found a free
CAD program which I used to get my drawing into 3D.
The bonus was that the program also told me what the volume is. Apparently it's 12.481 liters but presumably that's based on the outside dimensions. A liter is awfully close to a U.S. quart. So, call it 3 U.S. gallons. As built, it turned out to be 10 litres. I drew it so that, in profile, it should look very much like the factory hard bags. |
|
|
|
|
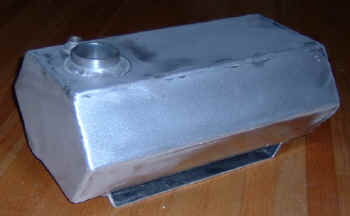
| Here's the little beauty, just home from the fab shop. Not bad for $180 Cdn ($145 U.S.) For the life of me, I don't know why the shop put the seam along the top like that. That's going to take some serious finishing work. He also didn't get the radius like I wanted. Maybe in V 2.0 huh ? |
|
|
|
|
| An hour with a file and a random orbital sander and we're making some serious progress. Must be very careful not to take off too much metal. If it looks like it might be getting to thin in the seams, a coat of epoxy may be in order. |
 |
|
|
|
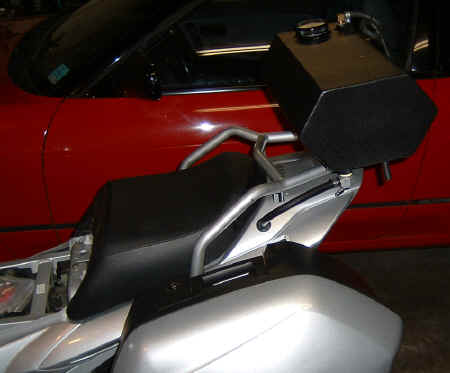
| Still a long way from being
finished, I set it on the factory rack to get a sense of proportion. Not
too bad so far. It has roughly the shape of the saddlebags which is what
I wanted.
One major improvement from the Connie tank is that the petcock is within easy reach of the rider while at speed. |
 |
|
|
|
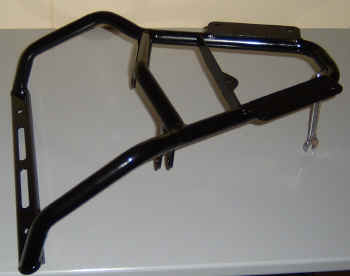
| I found this FJR Givi mount
on eBay for $85 Cdn (about $70 U.S). You can buy them new for
around $200. So far, this looks like it is going to be damn near
perfect.
[July 2006 Update; The damn rack broke, never to be used again.) The added weight of the gas from mounting the tank up top is no big deal. I had a similar sized tank on my Concours and never noticed it was there. As for sloshing, it doesn't really start to move around much until the tank is down to about the half full mark. By that time, it doesn't weigh much. I never felt any movement from the Concours aux tank. I'm not going to worry about baffles or tank foam. |
|
|
|
|
| This is the petcock that I
bought. It's a Pingel #1210-AH. It's far better than the one I used on
the Connie tank. It has no reserve and the lever movement is oh so
smooth compared to the Connie aux tank valve. You can just feel the
quality of this little gem. This is not the place to try saving a few
dollars. I had to order it directly from
Pingel as nobody stocks this one. Yes, I checked. I paid about $60 for
it. Expensive, but I like the quality and the screen is far better than
the one on my Connie aux tank. And it's rebuildable.
Pingel is quite specific about instructions on sealing the threads. According to the instructions, Teflon tape should be used on the threads. I just learned that there is the hardware store Teflon tape for plumbing and air fittings and then there is the "other" kind for gasoline environments. I'll be investigating. "You must apply at least 3 revolutions. DO NOT use Teflon liquid or pipe dope, use only Teflon tape." |
|
|
|
|
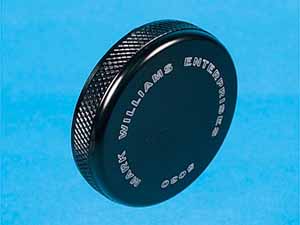
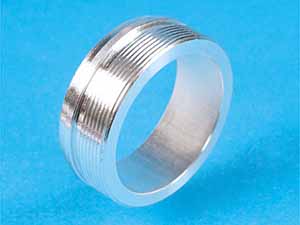
| Filler cap It's a non-vented cap from Mark Williams Enterprises The weld in bung also from Mark Williams. I think that Sampson Sport Touring also sells these. |
|
|
|
|
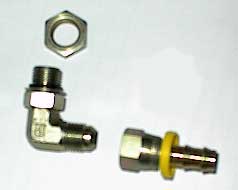
| There's a really
good article on installing a fitting to your stock tank so you can
transfer the fuel in from the aux tank. You can buy the fittings from Sampson
Sport Touring. I bought one of these and really liked it.
I mounted it on that quarter sized dimple in the bottom of the tank but the o-ring is about the same size as the tank dimple so be very careful, otherwise you may end up with the o-ring staggered on the edge of the dimple a bit and it may not seal properly. So far, so good. |
 |
|
|
|
| I'll bet you wondered like I did, about how you were going to get your tank off without spilling any gas. These fuel line quick disconnects also come from Sampson. A quick Google and these were the only metal ones I found. Not sure if they're any better or not than the usual plastic models. | 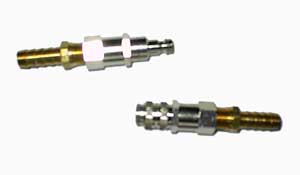 |
|
|
|
| You may want an inline fuel filter or two as well. Carry a spare. If it clogs up, you may be hooped until you find another one. Or get one of those fancy dancy aluminum body models that you can clean all the schmegma out of. Remember to be sure that you orient the filter to the proper flow direction. There's usually an arrow on the casing. I just cleaned out the filter on my Concours. After seeing the crud in there, damned rights I'll put one on the FJR.. It was the one on the right. Now, in hindsight, that's the one to go with as they are easy to clean if you don't have a new one on hand. | 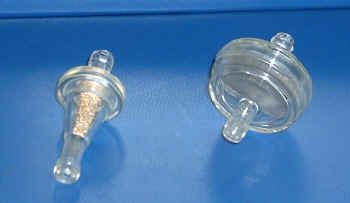 |
|
|
|
| I filled it to the brim, measuring with a 4 liter jug of water. Maximum capacity is 11 liters; call it 10 litres with a safe air space. With 25 liters in the main tank, that's a 40% increase in fuel capacity for a total of 35 liters. | 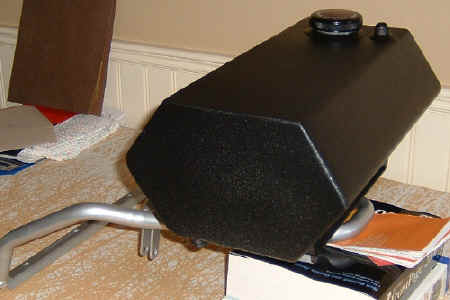 |
|
|
|
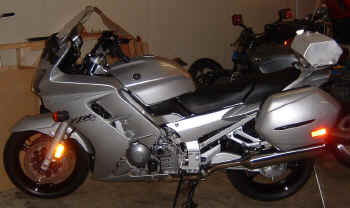
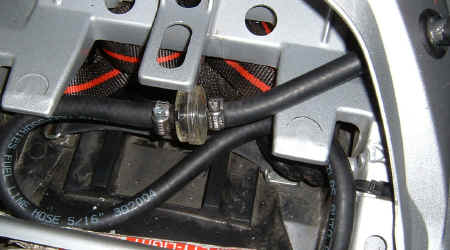
| Finally bolted into place.
You can see where I drilled into the plastic and inserted the rubber
grommet.
With that bit of space from the front of the tank to the back of the seat, it looks like there's room for more capacity. |
 |
|
|
|
| Although the Pingel petcock
has a very nice, fine screen in place, I added a filter just in case. I
also left a fair bit of extra hose in place until either I need the
space or find out the optimum amount needed to move things around,
change tail light bulbs, etc. Then I'll shorten it a bit.
You get another angle of the grommet here too. |
 |
|
|
|
| Update: After mounting the cell, I headed from Vancouver to Halifax, Nova Scotia. I did a Trans Canada Gold ride on the way back and the cell worked just as intended. It's easy to lean back and flip the petcock open while on the move. Range was about 600 Km's / 360 Miles. I never had the opportunity to push it that far but I knew my math was right. I did have 3 legs of about 500 Km's though. | |
|
|
|
|
Updated: October 17, 2008 |
|